Showing posts with label Christmas. Show all posts

Monday, July 15, 2013

Blast From The PAST Christmas Decorations

I've taken a trip back to the 80's and pulled out the pasta! 
 Vintage piping nozzle with pasta star, how sweet this is!

 Pasta and ice block stick cross...because Jesus is the reason for the season!
 Finger knitted wreaths, these are addictive to make!

To make one like the wreath below, finger knit two chains using two strands each. (Green/Green and Green/Red.) You will  need approx 1m of wool per colour.
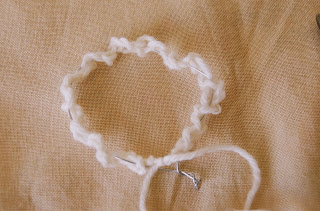
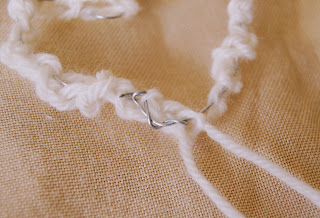
 Secure at one end and twist the two chains together,secure with another knot in a wreath shape. Add a 3rd colour (mine was white) or continue with one of the other colours, Start at the knot and do a long stitch around the wreath to help secure it's shape. Finish where you started and secure a pasta flower (or bead, button, bow, shell....) to cover the knot. Add hanging loop and you are done!
 
This wreath is 2 chains of green (4 green strands) and then wrapped in the candy striped wool. (I used approx 50cm of white and red twisted.)
 
Last but not least, a pastatastic post wouldn'tbe complete without a pasta chain...
 

Have a BLAST from PAST this Christmas and bring in the thrifty, hand-made charm of home!


Saturday, July 13, 2013

Cookie Cutter Christmas Craft

Yes, I know it's not Christmas yet, but it is Winter and it is the school holidays and that means...MID WINTER CHRISTMAS PARTY!!!  I've been having a lot of fun with  a few vintage cookie cutters and several balls of wool lately!
These are so easy and thrifty to make, simply choose your cutters and wrap wool around them.
Told ya! These are easy to make and really add some home made cheer to my table tops.
 I tied mine on to a simple vase to create a centerpiece but I think they'd look equally great on the wall or in a window display too....but then again, I am in love with these!
 1 cookie cutter 3 ways...

Our mid-winter Christmas party is next week. The woolen decorations fit the theme perfectly (as we have a Summer time Christmas here.) I am glad to for the opportunity to celebrate Christmas in BOTH seasons...all though without the presents this time!

I will be on the hunt for these cutters in the second hand shops now (I'm kicking myself for all the ones I know I've left behind before!) so I can make summer themed cutters too.

Thank you for visiting Ol' Mother Hubbard!

Sunday, July 7, 2013

Wired Heart DIY


I started today making fork pompoms, moved to finger knitted chains and eventually to wired hearts, I love it when the creativity flows like that! I got the kids in on the act too and I can't wait till our window display is finished and I can share it with you.

The start of a cheerful winter garland, a wired heart and 2 of the fork pompoms the led me here!

Quick Wired Heart Tutorial

Start by finger knitting a single chain in your desired colour. It is possible to achieve a similar chain using a single crochet chain. Not my area of expertise though!
Thread a thin piece of wire through the chain, the wire needs to be about 4cm longer on each end than your wool chain.
(A you tube Finger Knitting video can be found here.)

Bend into a circle, tie the ends of the wool and wind the wire ends shut.
Tuck the remaining wire 'tail' behind so it can't be seen.
Finish shaping your heart. Personally, I like the woven wire showing, if you don't you will need to weave the wire through your chain by entering the next stitch as close as you can. My wire wasn't all that flexible to use but with patience it was possible.
Tying a hanging loop from the top centre of the heart encourages the wool to stay in the 'dip' of the heart, a looser fit like the hearts below results where no tie is in place.

To make interlocking hearts like these ones make one heart and thread the next one through before joining the wires at the end. It's that easy and super effective, what's not to heart about that?

Watch this space for an exiting wool and wire project next post!

May your nest be blessed,
Lisa


Monday, July 1, 2013

Up-Cycle Christmas Lights


Winter display (I'm in the Southern Hemisphere) using wild daisies, owl candle, thrift-shop ceramic mice and up-cycled plastic Christmas bulbs.

There's need to throw away lights with broken bulbs or a faulty circuit.
Big globes like these ones are perfect for adding a little glam to your mantel or for use as vase fillers.
Simply snip them from the wire and use them according to your own tastes and theme.
How easy is that?
 Too sweet...I love this small display with it's stony, earthy colours. 
I can see these up-cycled balls being used at Christmas and at an upcoming coastal themed party. Can you see them as bubbles or beach glass on the shore? I can!


May your nest be blessed,
Lisa