Pages

Wednesday, July 31, 2013

MID WINTER Christmas Party

 A mid winter Christmas party needs...
Flowers
 I love that I can have jonquils and red berry's in the same vase, a taste of winter and spring on my table.
Vintage toys...

 Silly games...
 Marshmallow's to roast and Christmas trees on sticks (aka gummy planes)
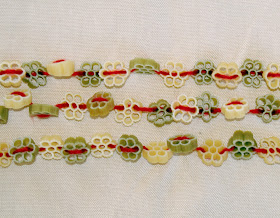
I'm loving the owl with the berries and pine cones! Spot the pasta chain too.
 Mini pine cone Christmas trees made by my son (we used a napkin ring as a stand)
and...vintage Christmas linen embroidered long ago!


Merry Mid Winter Christmas to you all!

Wednesday, July 24, 2013

Treasure Chest Thursday week 4


Twine wrapped bottles and Jute tied bottles aren't an original idea. They're right up there with macrame plant hangers and wall hangings..and there is a reason they've made a comeback. Check out this gorgeous tutorial for sewing a fish net to spruce up those bottles!

The Smallest Forest posted this cool geometric pattern to use up those last bits of thread. Waste not! I love this idea, imagine the awesome things the finished fabric could be turned into.

Bees Wax ornaments...need I see more. I want to make these, hundreds of them! Here's a short poem from the same post.

The Bee
His labor is a chant,
His idleness a tune;
Oh, for the bee’s experience
Of clovers and of noon!

- Emily Dickinson


Ribbon weave baskets...roll on spring I say! Officially there's still around 5 weeks to go but I've already spotted wild bulb flowers growing along the road side. Such sweet promise! Unfortunately I couldn't find the actual tutorial but if you click this image it will enlarge so you can be inspired too.

I tried making these pine cones. Mine came out a little rough but it will be worth me having another go. These are sweet and the tutorial is great. It was me that was the problem not the cones! Haha.

Last but not least...Make it a Wonderful life posted this CD weaving tutorial.
I think this is a fantastic idea and if I ever yarn bomb a tree these are going to be on it!

Tuesday, July 23, 2013

A MID WINTER Xmas Party part 1

Toothpaste box snowflake

We've been looking forward to this for weeks! Our mid winter Xmas party...tomorrow!


 Tiny fork pompoms
 Cardboard Wreath (Re-purposed toilet rolls)

 Geometric snowflakes
It's not the best place to photograph unfortunately, but trust me when I tell you this looks fantastic!

Oh...and we have a special guest coming to join the table-scape...
 I can't wait to set up the table tomorrow!

See you soon with part 2- the feast and the fancy!

Wednesday, July 17, 2013

Treasure Chest Thursday Week 3


It's Treasure Chest Thursday! I can't believe how quick this week went!
This is the post where I share some of the many things that have inspired me this week. It's my way of saying thanks to the bloggers and pinners who've given me something to put in my treasure chest of ideas!


Here are 6 inspirational posts that I have enjoyed this week, I hope you do too!

My Material Life  posted DIY instuctions on how to make these adorable wreaths using a Knitting Nancy made from a toilet roll. (Back in 2011!) I loved this idea I made 7 wreaths and don't think I am finished yet! lol. I finger knitted mine but the inspiration came from here.

How We Montessori posted this circular weaving tutorial (also back in 2011) and I am definitely giving this ago! I am thinking in spring using spring-time colours...

This link takes you to the most gorgeous decoration, I am thinking the acorn cap ball will be perfect for Autumn, Mid Winter Christmas and Christmas! I am wishing I had collected some caps when it was Autumn!

Who doesn't love a pretty wind chime? I can't wait to make these with the kids. Yest another reason to keep my eyes out for cookie cutters in the second hand shops!

I was given permission to share this Terrarium tutorial from Pieced Past Times. Bring back Terrariums I say. This is a beautiful, inspiring example.

Apple fritters. Need I say more??? You will find the recipe here. I can not be responsible if you become addicted!


WOULD YOU like to be featured? I would love to be inspired by your ideas, tips and awesomeness!
If you were featured feel free to grab the collage for your own uses.

May your nest be blessed.
Lisa

Monday, July 15, 2013

Blast From The PAST Christmas Decorations

I've taken a trip back to the 80's and pulled out the pasta! 
 Vintage piping nozzle with pasta star, how sweet this is!

 Pasta and ice block stick cross...because Jesus is the reason for the season!
 Finger knitted wreaths, these are addictive to make!

To make one like the wreath below, finger knit two chains using two strands each. (Green/Green and Green/Red.) You will  need approx 1m of wool per colour.
 Secure at one end and twist the two chains together,secure with another knot in a wreath shape. Add a 3rd colour (mine was white) or continue with one of the other colours, Start at the knot and do a long stitch around the wreath to help secure it's shape. Finish where you started and secure a pasta flower (or bead, button, bow, shell....) to cover the knot. Add hanging loop and you are done!
 
This wreath is 2 chains of green (4 green strands) and then wrapped in the candy striped wool. (I used approx 50cm of white and red twisted.)
 
Last but not least, a pastatastic post wouldn'tbe complete without a pasta chain...
 

Have a BLAST from PAST this Christmas and bring in the thrifty, hand-made charm of home!


Saturday, July 13, 2013

Cookie Cutter Christmas Craft

Yes, I know it's not Christmas yet, but it is Winter and it is the school holidays and that means...MID WINTER CHRISTMAS PARTY!!!  I've been having a lot of fun with  a few vintage cookie cutters and several balls of wool lately!
These are so easy and thrifty to make, simply choose your cutters and wrap wool around them.
Told ya! These are easy to make and really add some home made cheer to my table tops.
 I tied mine on to a simple vase to create a centerpiece but I think they'd look equally great on the wall or in a window display too....but then again, I am in love with these!
 1 cookie cutter 3 ways...

Our mid-winter Christmas party is next week. The woolen decorations fit the theme perfectly (as we have a Summer time Christmas here.) I am glad to for the opportunity to celebrate Christmas in BOTH seasons...all though without the presents this time!

I will be on the hunt for these cutters in the second hand shops now (I'm kicking myself for all the ones I know I've left behind before!) so I can make summer themed cutters too.

Thank you for visiting Ol' Mother Hubbard!

Wednesday, July 10, 2013

Treasure Chest Thursday Week 2


Welcome to the 2nd edition of Treasure Chest Thursday!
Treasure Chest Thursday is all about thanking just a few of the bloggers who've inspired me this week.
If you have been featured, feel free to grab the collage or image above for your own uses. 
Would you like to be featured? Drop me a line! I'd love to see your inspiring projects, recipes and home education ideas!


1) It's eco friendly and it looks way cool. I am sure you will agree when you see the quilled paper decorations here on 'Saved by Love.' I think I will give these a try for our tree this year.

2) Shanty2Chic posted this awesome hanging basket stand
Their is a tutorial to make this from scratch but I am seriously inspired to make the stand from an old drawer or window frame...this idea is a keeper in my treasure chest of project for sure!

3) This post is going back quite a while on the Dishfunctional Designs blog but I love it. 
Everything about it.
 I almost want it to rain all holidays so I can spend hours being inspired by this post. (Almost!) Lots of images to oooh and ahhh over here.

4) Enchanted Bella posted this Junk Bird Feeder
I would love, love, love to look out into my yard and see this bird feeder, or be a bird! Haha.
 I am totally inspired, how about you?

5) Twiggy Nest inspired me to make pompoms with the kids. We now have pompoms hanging from a window as part of our winter window display (photo soon.)  You will have seen glimpses of them in other posts.  I am stoked to make pompoms that didn't fall apart! I love the blog name too :)

6) Last but not least are some super cool wrapping ideas for your gifts. They make me want to do all my Christmas shopping early just so I can look at these pretty parcels! Found on Babble.


Monday, July 8, 2013

Wired and Woolly Lettering.

I am so excited about these wonderful, wired and woolly words! This discovery has opened up a whole lot of creative roads for me, I can see these words and other woolly letters appearing everywhere!


 I used the same finger knitting and wire technique as I did for my wired hearts 
but made the chains longer. The word HOME used about 3m of wool gave me about 1.5m of chain. The wire needs to be the same length as the finished chain. Unlike the hearts I used 2 strands of wool for a chunkier result.
As the lettering had more loops than the hearts I also found I had to place the odd stitch to help it all hold shape.
This may seem obvious, but before committing to your word lay the design out before you complete the chain. As the example above shows I would need to add more chain to make a star this size from a 1.5m chain or make a smaller star. There's nothing worse than getting to your last letter and finding out you've gotten to the end of the wired chain first...or so I've heard! Hehe.

The options are fairly endless when it comes to these shapes and words.
Imagine white wool winter words, pink valentines or blue and beachy?
Black with orange for Halloween ,just add spiders!
Red and green at Christmas, words or wreaths, stars and angels...boys names, girls names...
WIRED and INSPIRED!


May your nest be blessed!
Lisa

Coming soon:
Treasure Chest Thursday

Sunday, July 7, 2013

Wired Heart DIY


I started today making fork pompoms, moved to finger knitted chains and eventually to wired hearts, I love it when the creativity flows like that! I got the kids in on the act too and I can't wait till our window display is finished and I can share it with you.

The start of a cheerful winter garland, a wired heart and 2 of the fork pompoms the led me here!

Quick Wired Heart Tutorial

Start by finger knitting a single chain in your desired colour. It is possible to achieve a similar chain using a single crochet chain. Not my area of expertise though!
Thread a thin piece of wire through the chain, the wire needs to be about 4cm longer on each end than your wool chain.
(A you tube Finger Knitting video can be found here.)

Bend into a circle, tie the ends of the wool and wind the wire ends shut.
Tuck the remaining wire 'tail' behind so it can't be seen.
Finish shaping your heart. Personally, I like the woven wire showing, if you don't you will need to weave the wire through your chain by entering the next stitch as close as you can. My wire wasn't all that flexible to use but with patience it was possible.
Tying a hanging loop from the top centre of the heart encourages the wool to stay in the 'dip' of the heart, a looser fit like the hearts below results where no tie is in place.

To make interlocking hearts like these ones make one heart and thread the next one through before joining the wires at the end. It's that easy and super effective, what's not to heart about that?

Watch this space for an exiting wool and wire project next post!

May your nest be blessed,
Lisa